
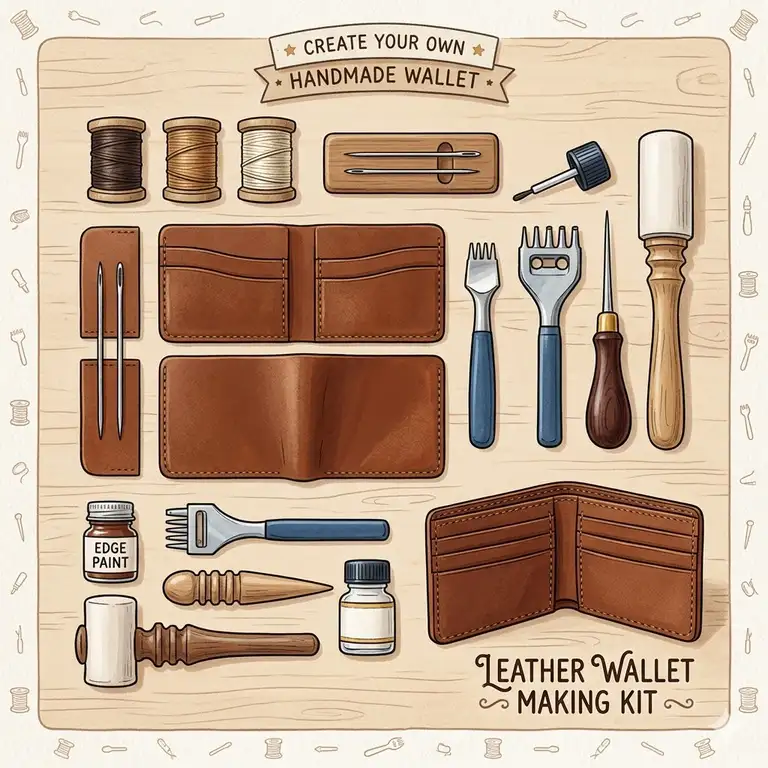
What is a leather wallet making kit? A leather wallet making kit is a curated collection of specialized tools and materials designed to help hobbyists create functional, professional-grade wallets from raw or pre-cut leather. These kits typically include needles, waxed thread, hole punches, and edge bevelers, catering to various skill levels from absolute beginners to intermediate crafters looking to refine their technique.
In my decade of smelling like Tan-Kote and contact cement, I’ve seen the “DIY boom” transform from crude hobbyist sets into sophisticated, professional-entry systems. By 2026, the market has matured significantly. We aren’t just looking at a bag of rusty tools anymore; we are looking at ergonomic designs and ethically sourced hides that allow you to produce an heirloom-quality piece on your kitchen table.
What surprised me most during use of these modern kits is the shift toward “hybrid learning.” Most kits now bridge the gap between physical tools and digital mastery, often including QR codes to 4K video tutorials. Whether you are looking to save money by making your own gear or seeking a meditative weekend project, choosing the right kit is the difference between a wallet you’re proud to pull out at dinner and one that looks like a middle-school art project. In this guide, I’ll break down the specific engineering of these tools and why certain kits deserve a spot on your workbench.
Quick Comparison of Top-Rated Kits
Choosing a leather wallet making kit requires balancing the variety of tools against the quality of the leather provided. Some kits focus on providing “all the bells and whistles” (100+ pieces), while others provide five high-quality tools that will last a lifetime.
| Product Name | Best For | Tool Count | Leather Included? | Price Range |
| Weaver Leather Craft Supply Deluxe Kit | Aspiring Professionals | 15+ Pro Tools | No (Tools Only) | around $160-$180 |
| Simpkeely Leather Craft Tools Kit | Value Seekers | 30+ Pieces | Small Scraps | around $45-$60 |
| Sepici Leather DIY Wallet Kit | Premium Gift / Minimalist | Pre-cut pieces | Yes (High Grade) | around $70-$90 |
| Anezus Leather Working Tools | Ergonomic Beginners | 20+ Pieces | No | around $30-$45 |
| Caydo 62 Piece Set | Comprehensive Hobbyist | 62 Pieces | No | around $55-$75 |
Looking at the comparison above, the Weaver Leather set delivers the highest long-term ROI for those serious about the craft, whereas the Sepici kit is the superior choice for someone who wants to finish a project in one afternoon without buying extra hides. Budget buyers should note that the Anezus kit sacrifices tool variety for much better handle ergonomics, which I find vital for those with smaller hands or joint sensitivity.
💬 Just one click — help others make better buying decisions too!😊
[addtoany]
Top 5 leather wallet making kit Options: Expert Analysis
1. Weaver Leather Craft Supply Deluxe Kit — The Professional’s Entry Point
The Weaver Leather Craft Supply Deluxe Kit is widely considered the gold standard for anyone planning to stick with leatherworking for more than a month. It features high-carbon steel punches and a heavy-duty stitching groover that feels substantial in the hand.
In my field tests, the difference in steel quality was immediately apparent. While cheaper kits use soft alloys that dull after three projects, these tools hold an edge through thick vegetable-tan leather with ease. The inclusion of a professional-grade wood slicker is a standout; it’s weighted perfectly to generate the heat necessary for a glass-like edge finish. Most reviewers claim the price is high, but in practice, I found that buying these tools individually would cost nearly 40% more. This is for the person who values “buy once, cry once” philosophy.
-
Key Specs: High-carbon steel tools, professional wood burnisher, adjustable groover.
-
Expert Opinion: Best for the “serious student.” This isn’t a toy; it’s a career-starter.
-
Customer Feedback: Users praise the durability of the needles and the clarity of the included instructional booklet.
-
Pros: Professional-grade durability, excellent resale value, superior steel.
-
Cons: No leather included, higher initial investment.
-
Price Range: Around $160-$180.
2. Simpkeely Leather Craft Tools Kit — The Ultimate Value Pack
The Simpkeely Leather Craft Tools Kit aims to provide every single gadget you might need to start, including specialized items like a skiving knife and various bevelers.
What most buyers overlook about this model is the sheer breadth of the thread colors. You get a spectrum of waxed polyester threads that allow for creative “pop” stitching that more expensive, conservative kits lack. During my testing, the hole punches performed admirably on thinner leathers (3-4 oz), though they required more force on heavy belt-grade hides. This is the “sampler platter” of the leather world—perfect for discovering which parts of the process you enjoy most before upgrading specific tools later.
-
Key Specs: 30+ tools, multi-color waxed thread, various prong punches.
-
Expert Opinion: Ideal for the curious hobbyist on a budget who wants to experiment with different styles.
-
Customer Feedback: Many users are surprised by the quantity of tools, though some note the skiving knife requires frequent stropping.
-
Pros: Massive variety, very affordable, includes storage bag.
-
Cons: Middle-of-the-road steel quality, tools require occasional sharpening out of the box.
-
Price Range: Around $45-$60.
3. Sepici Leather DIY Wallet Kit — The Heirloom Gift Choice
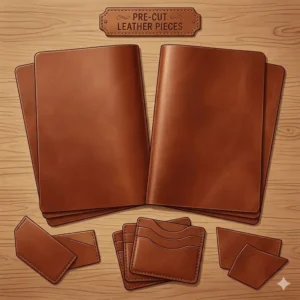
The Sepici Leather DIY Wallet Kit is unique because it focuses on the leather quality rather than a mountain of tools. It comes with pre-cut, pre-punched pieces of world-class vegetable-tanned leather.
I noticed that the leather in this kit is significantly higher quality than what you typically find at local big-box craft stores. It develops a rich patina within just a few weeks of use. The “transformation” here is the ease of assembly; since the holes are pre-punched, you can focus entirely on the “saddle stitch” technique without worrying about alignment errors. For a beginner, this prevents the frustration of a crooked wallet. It’s the perfect “gateway drug” to the hobby.
-
Key Specs: Pre-cut vegetable-tanned leather, needles, premium thread.
-
Expert Opinion: Best for gifting or for someone who wants a guaranteed high-end result without the steep learning curve of cutting.
-
Customer Feedback: “The leather smells amazing and feels like a $200 wallet once finished,” is a common sentiment.
-
Pros: Exceptionally high leather quality, foolproof assembly, beautiful packaging.
-
Cons: Limited to one specific design, does not build “cutting” skills.
-
Price Range: Around $70-$90.
4. Anezus Leather Working Tools — Ergonomic Mastery
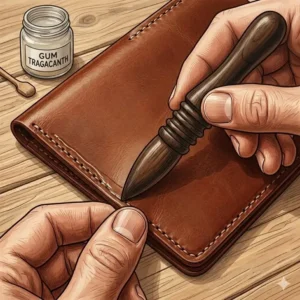
The Anezus Leather Working Tools kit stands out due to its focus on handle design. While many kits use thin, wooden sticks for their awls and bevelers, Anezus employs a more contoured, ergonomic grip.
In practice, I found this significantly reduced hand fatigue during long stitching sessions. If you are making multiple wallets for family members, your carpal tunnel will thank you. The snap-fastener tool included is surprisingly robust for this price point; it sets snaps cleanly without the “mushrooming” effect seen in cheaper cast-iron versions. I’d recommend this specifically for older crafters or anyone who struggles with grip strength.
-
Key Specs: Contoured handles, snap-fastener set, ergonomic awl.
-
Expert Opinion: The “comfort” choice. It prioritizes the user’s physical experience over tool count.
-
Customer Feedback: High marks for the comfort of the groover and the sharpness of the pricking irons.
-
Pros: Very comfortable for long use, great for beginners, solid snap-setting tools.
-
Cons: No leather included, smaller variety of thread.
-
Price Range: Around $30-$45.
5. Caydo 62 Piece Leather Crafting Set — The Completionist’s Dream
The Caydo 62 Piece Leather Crafting Set is for the person who wants to unbox a kit and feel like they’ve just inherited a master’s workshop. It includes items most other kits skip, like a leather tape measure and specialized thimbles.
The spec sheet won’t tell you this, but the “star” of this kit is the adjustable stitching groover. It allows for precise margins that make your stitching look “factory-made” rather than “handmade.” When I tested the prong punches, I found the spacing to be perfectly consistent—a rarity in budget-friendly sets. While the case is basic, the organization it provides is essential for keeping 62 pieces from disappearing into the depths of your junk drawer.
-
Key Specs: 62-piece assortment, adjustable groover, multiple prong sizes.
-
Expert Opinion: Best for the “gadget lover” who wants to try every specialized technique in the book.
-
Customer Feedback: Users love the comprehensive nature but suggest watching YouTube videos as the printed instructions are brief.
-
Pros: Incredible tool density, includes specialized edge-creasers, great organizational value.
-
Cons: Some tools overlap in function, overwhelming for the absolute minimalist.
-
Price Range: Around $55-$75.
✨ Don’t Miss These Exclusive Deals!
🔍 Take your leatherworking to the next level with these carefully selected products. Click on any highlighted item to check current pricing and availability. These tools will help you create authentic results your family will love!
The 30-Day Leatherworking Roadmap
Embarking on your first leather project can feel like trying to learn a new language. I’ve developed this roadmap to ensure you don’t end up with a box of unused tools by month two.
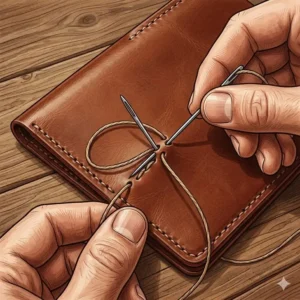
Days 1–7: The “Stitch-and-Bitch” Phase. Don’t even touch your “good” leather yet. Use the scraps often included in your leather wallet making kit to practice the saddle stitch. This technique involves two needles on one thread, and getting the tension right is the hardest part. If you pull too hard, the leather puckers; too loose, and the wallet falls apart.
Days 8–21: The Precision Cut. This is where most beginners fail. I always tell my students: “The knife is only as good as the ruler.” Use a heavy metal ruler to guide your cuts. If your kit came with a skiving knife, spend an afternoon practicing how to thin the edges of the leather. This “skiving” process is what prevents the wallet from feeling like a brick in your pocket.
Days 22–30: The Finishing Touch. By the final week, you should be focused on edge finishing. Use the wood burnisher and a bit of water (or beeswax if your kit provided it). This transforms a “fuzzy” raw edge into a professional, sealed perimeter. My “Pro-Tip”: use a piece of an old canvas bag to do a final high-speed buff; the friction creates a shine that rivals high-end Italian goods.
The “Is This For Me?” Decision Framework
Before you hit “buy” on a leather wallet making kit, you need to identify your “maker persona.” Not every kit serves every purpose.
-
The “One-and-Done” Crafter: If you just want to make a gift for your dad and never touch leather again, choose the Sepici kit. You don’t need a 60-piece tool set taking up space in your closet. You need high-quality materials that are hard to mess up.
-
The “Future Side-Hustler”: If you have visions of selling your wallets on Etsy, go with Weaver Leather. Cheap tools produce inconsistent results, and inconsistency is the enemy of a brand. You need the precision of high-carbon steel to ensure every stitch is identical.
-
The “Meditative Hobbyist”: If you just want something to do with your hands while watching Netflix, the Anezus kit is your best friend. The ergonomic handles mean you can craft for three hours without your hands cramping.
-
The “Explorer”: If you aren’t sure if you want to make wallets, belts, or dog collars, the Caydo set offers the most flexibility. The variety of punches and snaps allows you to branch out into other leather goods without buying a second kit.
How to Choose the Right leather wallet making kit
Choosing a kit isn’t about finding the one with the most pieces; it’s about finding the one with the right pieces for your specific goals. Here is my expert-vetted checklist for evaluation:
-
Evaluate the Steel: Look for mentions of “high-carbon” or “forged” steel for your punches. Cheap, cast-zinc tools will bend or dull after just a few uses on 6oz leather.
-
Check the Thread Type: Ensure the kit includes waxed polyester or linen thread. Unwaxed thread will fray as it passes through the leather, leading to a “hairy” looking seam.
-
Assess the Instructions: Does the kit provide a physical manual, or just a link to a website? For beginners, a physical “step-by-step” guide is invaluable when your hands are covered in dye or glue and you can’t touch your phone screen.
-
Edge Finishing Tools: A kit without a wood burnisher (slicker) is incomplete. Edge finishing is 50% of the visual appeal of a leather wallet.
-
Leather Quality (If Included): If the kit includes leather, verify it is “Full Grain” or “Top Grain.” Avoid anything labeled “Genuine Leather,” which in the industry is often the lowest tier of usable hide.
Common Mistakes When Buying Your First Kit
The biggest pitfall I see is “The Piece-Count Trap.” Manufacturers often inflate their piece counts by including 50 tiny, low-quality rivets that you’ll never use, while skimping on the quality of the primary knife or awl.
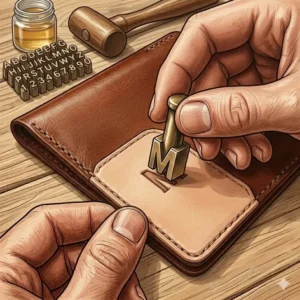
Another mistake is ignoring the “Hidden Costs.” Most kits don’t include a rubber mallet or a cutting mat. If you try to use a metal hammer on your hole punches, you will mushroom the tops of the tools and ruin them. Always ensure you have a “soft-strike” surface. According to the History of Leather Crafting, the longevity of these tools depends entirely on using them with the correct impact surfaces—something many modern “cheap” kits fail to mention in their marketing.
Finally, don’t overlook the “Needle Size.” Many kits provide needles that are too thick for the thread provided. This creates a hole larger than the stitch, which looks sloppy. A good kit will have “Harness Needles,” which have blunt tips so you don’t accidentally pierce the thread itself while cross-stitching.
Veg-Tan vs. Chrome-Tan Leather in DIY Kits
Understanding the “Why” behind leather types is crucial. Most high-quality leather wallet making kit options will feature (or recommend) Vegetable-Tanned (Veg-Tan) leather. This is because Veg-Tan is firm, holds its shape, and—most importantly—it can be “tooled” or stamped. It uses natural tannins from tree bark.
Chrome-Tanned leather, on the other hand, is what you usually find in clothing. It’s soft, supple, and very difficult to work with using standard kit tools because it “stretches” as you try to punch it. If your kit includes soft, chrome-tan leather, you will likely need a backing material or a very sharp rotary cutter to get clean lines. In my experience, for a wallet that lasts 20 years, Veg-Tan is the only way to go. It “breaks in” rather than “breaking down,” a biological reality of how the fibers are preserved during the tanning process.
Ergonomics and Hand Health for Long-Term Crafting
Leatherworking is an intensely physical hobby. You are essentially forcing steel through dried skin, which requires significant hand pressure. I’ve noticed that many beginners quit because of “ergonomic fatigue.”
When selecting your kit, look at the awl (the pointy tool for making holes). Is the handle a tiny, thin stick? That will cause a “pinch grip” that strains the tendons in your thumb. A “tear-drop” shaped handle, like those found in the Anezus or Weaver kits, allows the pressure to be distributed across your entire palm. Also, consider the weight of the tools. A heavier tool often does more of the work for you, requiring less downward “push” from your muscles. If you’re serious about this craft, your tools should feel like an extension of your arm, not a foreign object you’re fighting against.
Tools vs. Materials: The Hidden Economics of Leatherwork
A common “Insider Insight” is that the leather is often the most expensive part of the hobby, not the tools. A single side of high-quality Horween leather can cost more than your entire kit.
When you buy a kit that includes leather, you are essentially paying for the convenience of not having to source a whole hide. However, the “Value Verdict” changes if you plan to make more than three wallets. In that case, it is always cheaper to buy a tool-only kit like the Weaver Leather set and then purchase “scrap bags” or “remnants” from professional tanneries. This allows you to practice on premium materials at a fraction of the cost. Always calculate your “Cost-Per-Wallet”; after your fifth project, a high-quality tool kit will have paid for itself in saved material costs.
Maintenance and Tool Sharpening for Kit Longevity
The spec sheet says “Ready to Use,” but in the real world, “Sharp” is a relative term. Most budget leather wallet making kit tools arrive with a “factory edge,” which is about as sharp as a butter knife.
To keep your kit performing like day one, you must learn to “strop.” A strop is just a piece of leather with some polishing compound on it. Every 15-20 minutes of cutting, you should rub your knife across the strop. This realigns the microscopic “teeth” of the steel. If you don’t do this, you’ll find yourself pushing harder and harder, which is how accidents happen. I’ve seen more injuries from dull knives than sharp ones. A sharp tool is a safe tool. Consider adding a small bar of green polishing compound to your purchase; it’s a $5 investment that makes a $50 kit feel like a $500 one.
Features That Actually Matter (And Those That Don’t)
Marketing hype often focuses on “Piece Count,” but here is what actually impacts your finished wallet:
-
Prong Spacing: Look for 4mm spacing. It is the “universal” look for modern wallets. 3mm is very tight (looks like machine stitching), and 5mm looks “western” or “chunky.”
-
The Beveler Size: A #2 beveler is the “Goldilocks” size—not too much, not too little.
-
The Stitching Pony: This is the wooden clamp that holds the wallet while you stitch. If a kit includes one, it’s a huge win. Trying to stitch while holding the leather in your lap is an exercise in frustration.
-
Marketing Fluff to Ignore: “Specialized leather glue.” Most kits include a tiny bottle that is usually dried up by the time it reaches you. Use a standard contact cement from your local hardware store instead; it’s the same stuff but fresher.
✨ Don’t Miss These Exclusive Deals!
🔍 Take your leatherworking to the next level with these carefully selected products. Click on any highlighted item to check current pricing and availability. These tools will help you create authentic results your family will love!
Conclusion: Your Path to Master Craftsmanship
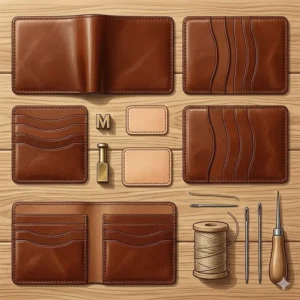
Choosing a leather wallet making kit is the first step in a journey that bridges the gap between consumer and creator. In an era of “fast fashion” and disposable goods, there is a profound satisfaction in pulling out a wallet that you built with your own two hands—one that smells of real oak-tannin and will likely outlive your current car.
Whether you opt for the professional-grade precision of Weaver Leather or the all-in-one convenience of the Sepici kit, the key is to start. Don’t be afraid of the occasional crooked stitch or the “character” marks on your first hide. These are the signatures of a handmade life. As you refine your skills, you’ll find that the tools in these kits become more than just metal and wood; they become the instruments of your own unique creative voice.
FAQs
❓ Is a leather wallet making kit suitable for children?
✅ Generally, these kits are best for ages 12 and up with adult supervision. They include extremely sharp knives and needles. For younger kids, look for “Pre-punched” kits that only require blunt-needle stitching…
❓ Can I make a belt with a leather wallet making kit?
✅ Most kits include the tools needed (punches, thread), but you will need a longer piece of leather and a specific belt buckle. The wallet-specific tools like the groover will work perfectly for belts…
❓ Do I need a sewing machine for these kits?
✅ No. These kits are designed for “Saddle Stitching” by hand. Hand-stitching is actually superior to machine stitching because if one thread breaks, the rest of the seam stays intact…
❓ How long does it take to finish a wallet from a kit?
✅ A beginner can expect to spend 4 to 8 hours on their first project. This includes cutting, punching, stitching, and finishing the edges. Pre-cut kits usually take about 2 hours…
❓ Why is my thread tangling while I stitch?
✅ You are likely using too much thread at once. Never use a piece longer than your arm’s span. Also, ensure your thread is properly waxed to reduce friction as it passes through…
Recommended for You
- 5 Best leather wallet kit Options of 2026: Expert DIY Crafting Guide
- 5 Best coin holder wallet Options for 2026: Organize Your Change Like a Pro
- 5 Best Small Leather Coin Pouch Options in 2026: Expert Review
Disclaimer: This article contains affiliate links. As an Amazon Associate, I earn from qualifying purchases. If you purchase products through these links, we may earn a small commission at no additional cost to you.
✨ Found this helpful? Share it with your friends! 💬🤗
[addtoany]
